
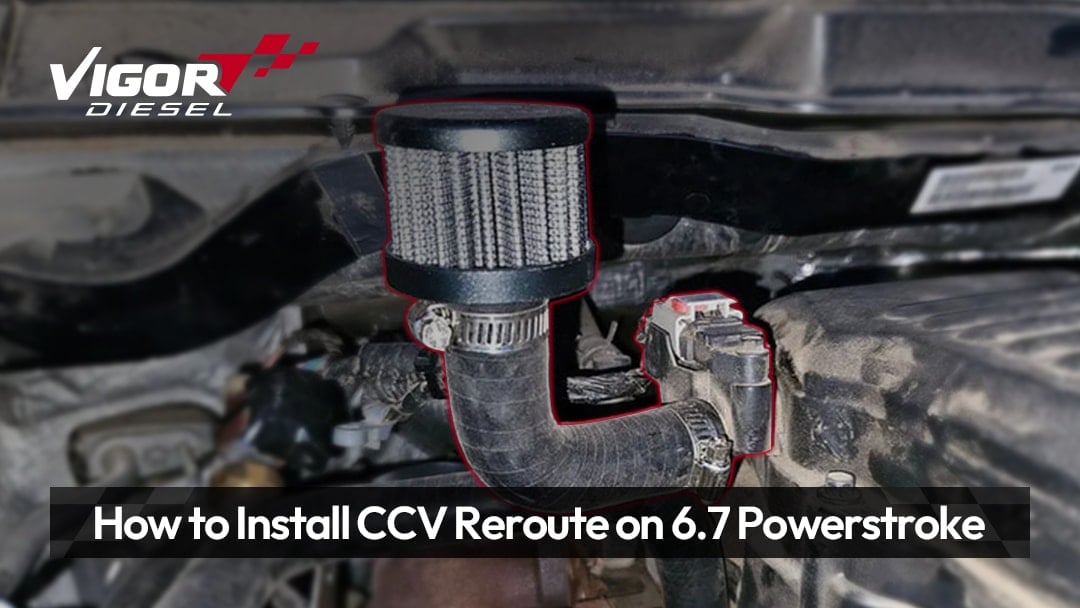
This guide provides clear instructions for installing the Vigor Diesel 2011-2025 Ford 6.7L Powerstroke CCV/PCV Delete/Reroute Kit (including catch can). This kit is designed to improve the performance of off-road racing vehicle engines by effectively redirecting crankcase blow-by (CCV) and reducing intake system contamination.
- Applicable Years: 2011–2025 Ford 6.7L Powerstroke
- Installation Difficulty : Medium (Requires basic DIY skills)
- Estimated Time : Approximately 2–3 hours
- Target Audience : Off-road/racing vehicle owners, diesel vehicle enthusiasts looking to reduce intake oil contamination
Key Disclaimer : This CCV Delete/Reroute kit is not suitable for any U.S. road vehicles regulated by emissions regulations and is for off-road or closed-track use only. Installing this product means you assume all associated risks and legal liabilities.
Required Tools and Checklist
Before starting installation, it is recommended to prepare all tools and accessories in advance to avoid repeated disassembly and assembly.
Common Tools
- Socket wrench and ratchet
- Torque wrench (inch-pounds)
- Slotted/Phillips screwdriver
- WD-40 or similar rust inhibitor lubricant
- Clean cloth or repair towel
- Safety goggles and protective gloves
Vigor Diesel Kit Included Components
- CCV Reroute/Delete Main Component
- Catch Can (external or internal, depending on version)
- O-ring seal
- Extended mounting bolts
- Intake port plug
- Required Installation Hardware
Precautions & Installation Tips
Before you begin, please pay special attention to the following points, as these details often determine the success of the installation:
- Never work with a hot engine; hot oils and metals can cause severe burns.
- Older vehicles often have rusted bolts are prone to rust; before disassembly, be sure to spray with rust inhibitor and lubricant and wait at least 10 minutes.
- When removing any intake or turbocharger-related components, prevent foreign objects from entering the system.
- Arrange the removed original screws and parts in order for easy reinstallation.
- When installing the built-in oil reservoir, if there are fitting issues due to Ford's original casting errors, you can lightly sand the friction areas.
Step-by-Step Installation Guide
Step 1: Preparation and Safety Measures Before Installation
First, ensure the vehicle is parked in a level, safe location and has completely cooled down. Then remember to wear safety glasses.
Disconnect the negative cable of the vehicle battery to cut off power. Ensure the engine is off and has cooled for at least 5 minutes. Turn the key to the "ON" position but do not start the engine. Wait for the fuel pump to run for approximately 30 seconds, then turn it off. Allow sufficient time for the engine to cool so fuel system pressure can naturally bleed off.
Follow all factory safety guidelines when working around fuel system components.
Step 2: Remove the Fuel Filter and Related Piping
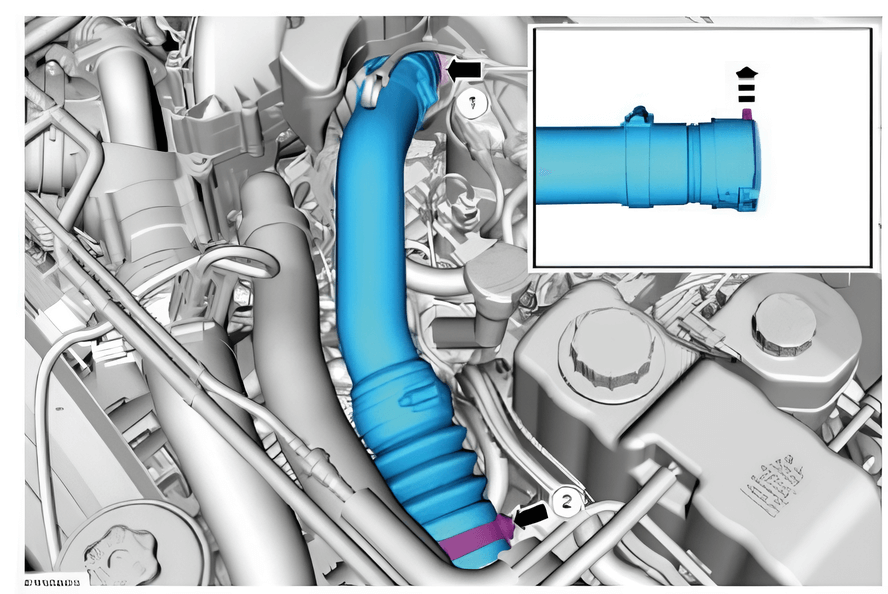
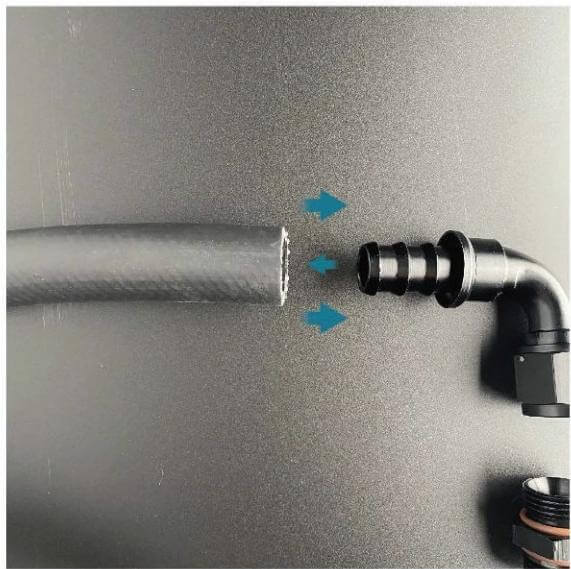
Locate and disconnect the intake pipe of the turbocharged air cooler (CAC). First, pull out the spring clamp and let it engage in the groove of the quick-connect fitting. Then, loosen the clamp and carefully remove the pipe. This step requires extreme care to prevent dust from falling into the turbocharger intake.
Next, disconnect the fuel filter's outlet and inlet pipes, as well as the injector return pipe, in sequence. Then, remove the left-side fuel supply pipe fixing bolts and remove the fuel filter and bracket assembly.
Step 3: Remove the Original CCV Oil Separator
Before removing the CCV oil separator, place a rag underneath it to absorb any leaking oil. Then, disconnect the CCV outlet hose connected to the intake manifold, remove the retaining bolts, and remove the original oil separator assembly. At this point, please double-check that all exposed connections have been temporarily sealed to prevent foreign objects from entering the engine.
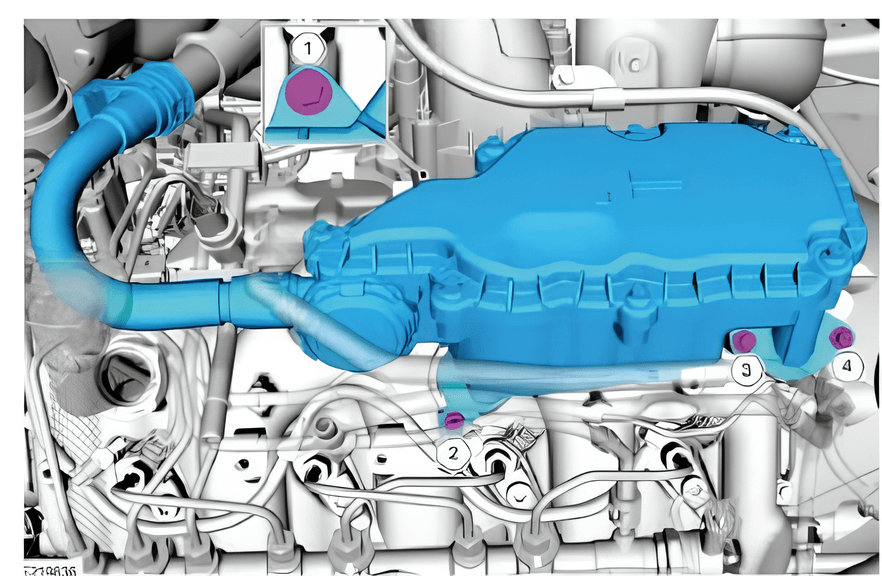
Step 4: Install the Vigor Diesel CCV Reroute Kit
After cleaning any residual oil from the engine's rear air intake, install the Vigor Diesel CCV Reroute Kit in its original position and tighten the mounting bolts evenly to a final torque of 96 in-lb.
Upon proper installation, the component should fit snugly against the engine without interference or uneven stress.
Step 5: Seal the Original Intake CCV Connector and Restore the Fuel System
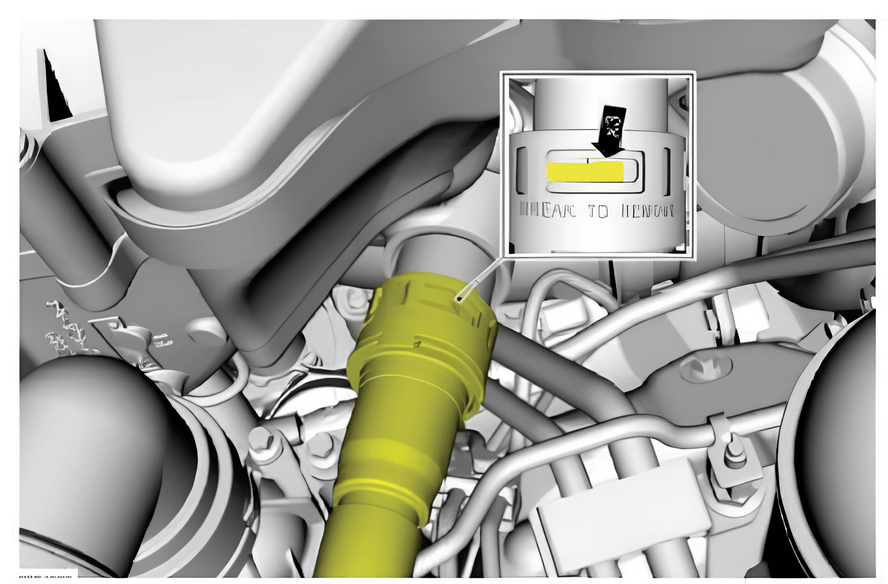
Install the sealing cap provided in the kit onto the original intake manifold's CCV connector. There is no pressure at this location; no additional clamps or cable ties are required.
Then, reinstall the fuel filter bracket, fuel supply line, fuel return line, and CAC intake line in the reverse order of disassembly, tightening each component to the specified torque values: CAC intake pipe (106 in-lb), fuel filter bracket bolts (85 in-lb), and other key bolts (96 in-lb) as detailed in previous steps.
Step 6: Restore Power and Bleed the Air-Fuel System
After reconnecting the battery, the fuel system needs to be bled using the ignition cycle:
Ignition switch ON (without starting the engine), wait 30 seconds. Turn off the ignition. Repeat the above steps 3 times. Maintaining a clean working environment throughout the process is especially crucial for high-precision fuel systems.
Special Procedure: CCV Internal Catch Can Installation
If your kit includes an internal catch can:
First, remove the original CCV outlet double-bolt flange. Then, install the internal catch can and O-ring together under the flange and secure it using the included extension bolts.
Due to factory casting tolerances, some vehicles may require slight grinding of the baffle edge to ensure proper placement. Apply this in small increments to avoid over-processing.
Post-Installation: Testing and Adjustment Techniques
After installation, first check all connections to ensure that pipes are free of twists, bolts are securely tightened, and there are no signs of oil or fuel leaks.
Start the engine and let it idle for 3-5 minutes, observing its smooth operation and listening for any abnormal noises. Simultaneously, re-check all connections for leaks.
After a normal idle test, conduct a short test drive (off-road only, no public roads) to test the kit's performance under acceleration and idling conditions, confirming no abnormalities.
After the initial installation, it is recommended to check the tightness of all bolts again after 100 kilometers of use, tightening any loose bolts promptly. Regularly check the oil level in the internal oil reservoir and clean it as needed to ensure the kit functions properly.
Frequently Asked Questions (FAQ)
Conclusion
By correctly installing the Vigor Diesel 6.7 Powerstroke CCV Delete/Reroute Kit, you can effectively reduce oil sludge buildup in the intake system, improving long-term engine reliability. This is ideal for 6.7 Powerstroke users who use their engines for off-road and racing purposes.
For genuine parts, technical support, or more 6.7 Powerstroke modification guides, please visit www.vigordiesel.com or contact [email protected].